
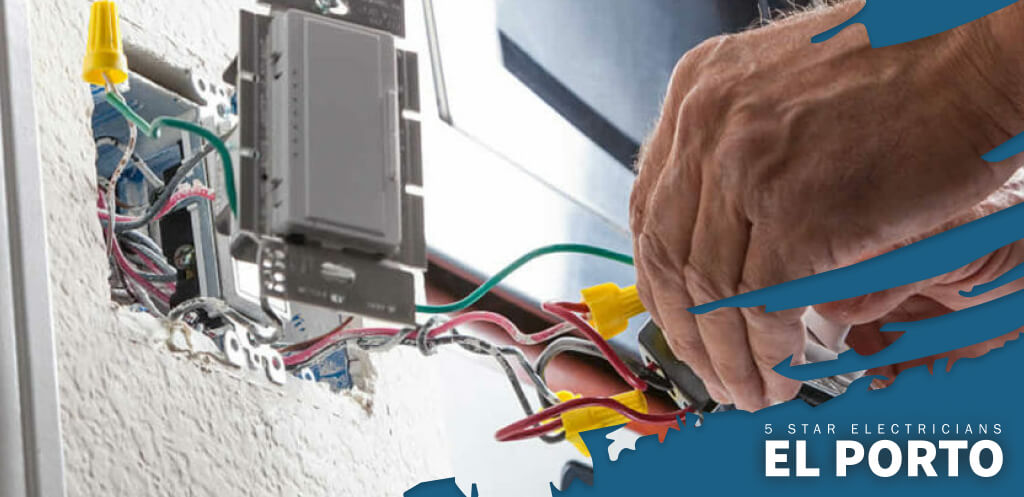
Even if you’ve been wiring electricals for years, there are always a few tips you might not be aware of. Together with our team of licensed electrical experts with years of experience, we accumulated tips, tricks, and techniques that may be helpful to you. These tips enable you to wire more effectively, swiftly, and neatly, from cable straightening to labeling wires.
If you ever find yourself in need of wiring replacement assistance from electrical professionals, you can count on one from 5 Star Electricians in El Porto.
- Uncoil Cable Wire Without Tangles
Straightening the cable out first makes it much easier to pull the plastic-sheathed cable through the holes in the framing. The secret is to lift a few coils from the roll’s center and throw them across the floor like a rope. Next, straighten the cable as you walk along its entire length. According to the electricians, this method is preferred because it allows them to keep the cable enclosed in the plastic wrapper for simpler handling and more organized storage.
- Organize Electrical Boxes
The problem of an overstuffed electrical box is probably something you’ve encountered if you’ve done a lot of wiring. Make sure your box is tidy and small. First, connect all of the bare ground wires with a long pigtail. Leave the pigtails extended and fold them into the back of the box. Do the same with the neutral wires next. A neutral pigtail is not necessary when connecting switches. Fold the hot wire across the bottom of the electrical wire box, going back and forth, leaving it extra long. One should mark the hot wire with a wire connector cap. You can easily distinguish the wires if the box is properly organized and allows plenty of room for switches.
- Take the Underground Feeder Cable’s Sheathing Off
Due to its durable plastic sheathing, underground feeder cables can be buried without passing through the conduit. Here’s an easier trick to removing the tough sheathing.
Grab the black and white wires with pliers and twist them away from the bare copper. When you have about a foot of separated wires, pull them apart. Then, using two sets of pliers, separate the sheathing from the insulated wires by grasping the wire’s end with one set and the sheathing with the other. Peel the sheathing off once you’ve separated it at the top, then use scissors or a knife to trim the loose sheathing.
- No-Snag Fish Tape Connections
The last thing you want is to lose the cable or have your fish tape become stuck on something inside the wall as you pull it back after going through all the trouble of working it to its destination. Here’s a tip for preventing that headache.
Strip an 8-inch length of cable first. Cut off all wires except for one with side cutters. Cut at a sharp angle to prevent a “shoulder” that might snag on something. After that, wrap the entire assembly in electrical tape to create a smooth bundle by bending the single wire around the loop on the end of the fish tape. Now that the wire won’t be caught on anything, you can push and fish it as necessary.
- Check the Full Wall Cavity
For every electrical project, a reliable stud finder is necessary, but you’ll use it for more than just stud detection. After locating the wall cavity between two studs, use your stud finder to scan the entire wall cavity vertically for obstructions like blocking and discarded headers.
- Must-Have Electrical Tools
Flex bits and glow rods are the go-to electrical tools that professionals use for fishing wires, so if you plan to do any electrical work, you should own them. Flex bits are excellent for drilling holes in awkwardly shaped areas, typically between 5 and 6 feet, and glow rods glow in the dark, as their name implies. Working in dimly lit areas makes it simpler to see the fishing wire.
- Push Through Extra Wire
When fishing wire to pull it toward you, ensure that there is sufficient wire to hook onto. When a wire is in your grasp, you don’t want to let go, as it can be difficult in some situations. Always make sure you have an extra wire length of at least five to six feet to maintain the tension on the hook as you pull it through.
- Identify Roughed-In Wires
You can avoid many headaches by identifying the wires as you install them. Electricians mostly use a “code” for marking wires, and so can you. Using a label is another strategy. However, when you return to connect switches and outlets, drywallers tapers, and painters may have covered or removed the label. So whenever possible, it’s best to use non-label coding. Create a plan, then put it in writing. Then when using a three-way switch, you’ll never have to guess which wires are the “line,” “load,” and traveler wires.
- Test Wires Before Touching Them
It’s easier to become complacent about whether the power is off after doing a lot of wiring, but don’t! Check each wire in the wire box or area you work using a non contact voltage detector. Before relying on a wire or cord you know to be live, always check the tester to ensure it is operational.
- Testing GFCI Outlets
GCFIs save hundreds of lives each year by identifying hazardous current flow and immediately cutting power. However, the delicate circuitry inside a GFCI starts to deteriorate after about ten years. Additionally, the GFCI’s test button typically doesn’t indicate any problems. Always pressing the button will result in the power being cut off. So using a circuit tester with a GFCI test button is the only reliable way to examine an older GFCI.
The good news is that you won’t ever need a circuit tester with your new GFCI. All GFCIs produced after the middle of 2006 are built to notify you when they malfunction. The vast majority do so by permanently cutting power as a failure indicator.
- Multiple Switches, One Hot Wire
Even with three switches, a wire box is already overcrowded; add additional wire connectors and pigtails at your peril. Here is a wiring method that results in fewer pointless connections and a cleaner installation.
Rather than running a separate pigtail from the hot wire to each switch, leave the hot wire extra long. The wire needs to be scored with a wire stripper, the insulation pushed back, and the exposed wire, about 3/4″ long, connected to the switches.
At least three-quarters of the way around the first switch’s screw terminal should be covered by this bare section. Repeat the procedure for the remaining intermediate switches. The final switch should be connected as usual by wrapping the wire around the screw clockwise.
- Strip Cable Sheathing First
It can be tempting to run your roughed-in cable through the knockouts in the box without worrying about how to remove the sheathing. The hard way, though, is that. Before inserting the wires into the box, it is much simpler to remove the sheathing.
The only trick is to ensure the cable is roughly in the correct location before marking it and removing the sheathing. You will have enough “play” to make the last adjustments after inserting the conductors into the box as long as the cable isn’t stretched too thin.
Quick Tips to Repair and Splice Wires

Over time, you will eventually need to learn some fundamental electrical skills as a homeowner to complete home improvement projects. Splicing wires may be necessary to connect two electrical wires, extend a wire, or repair damage.
There are two recommended splicing methods: the J-hook and the Lineman’s splice. Read on to find out more about them.
- To repair a J-hook, slide the heat shrink over one side, cut the frayed wire-free, and remove 3/8 inches of insulation at each end. Create a “J” shape with the wire ends and hook them together. To ensure the tips are tightly wound around the opposing wire, twist and tug them.
- To start doing the Lineman’s splice, cross the wires and bend the ends over each other several times after removing a half inch of insulation. In either situation, solder over the new connection, smooth out any burrs, and then slide the heat shrink sheath over the area and blast away with the heat gun. Then you may try to test the circuit.
It doesn’t matter if this is your first or one hundredth wiring project; always put safety first. If you are not confident doing the work yourself, you can reach out to the experts at 5 Star Electricians Pro in El Porto, where we offer a range of electrical services that accommodate your every need. Be sure to notify us without hesitation.
Your home’s electrical issues can sometimes be too complex and difficult to bear, especially without proper knowledge and training. Good thing 5 Star Electricians in El Porto extends its extensive services at economical prices. So do not hesitate to get in touch with us or check out some of our other blogs on our website anytime.